
How to Create and Manage Website Banners
What This Is
Website banners let you display a message across the top of every page on your website. Use them to announce promotions, share important updates, or collect email addresses from visitors.
You can customize the banner’s message, type, colors, and button text to match your website and marketing goals.
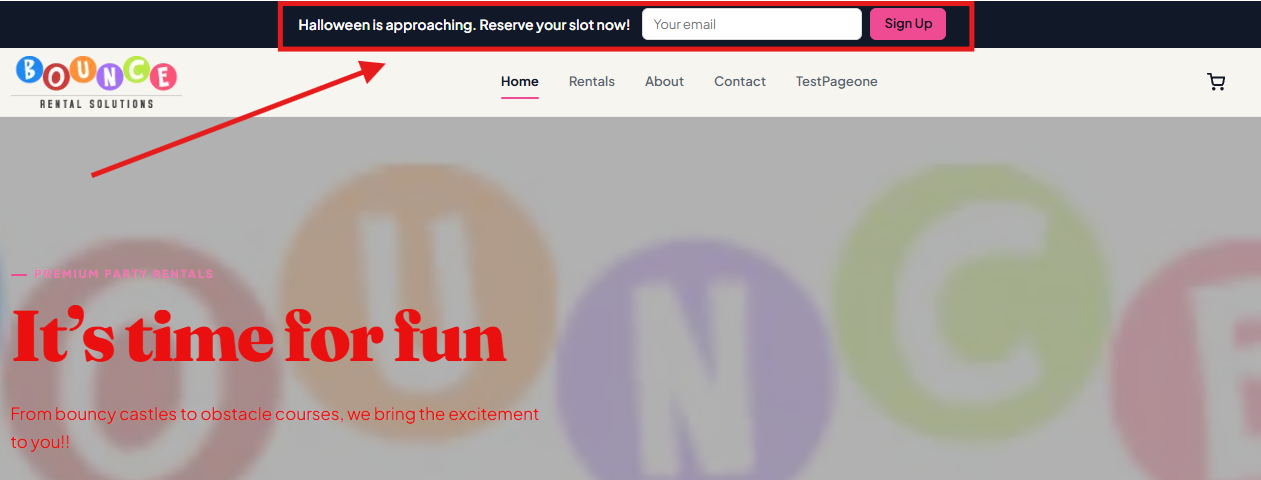
Where to Find Banners
1. Log in to your BRS dashboard.
2. Go to Leads → Banners.
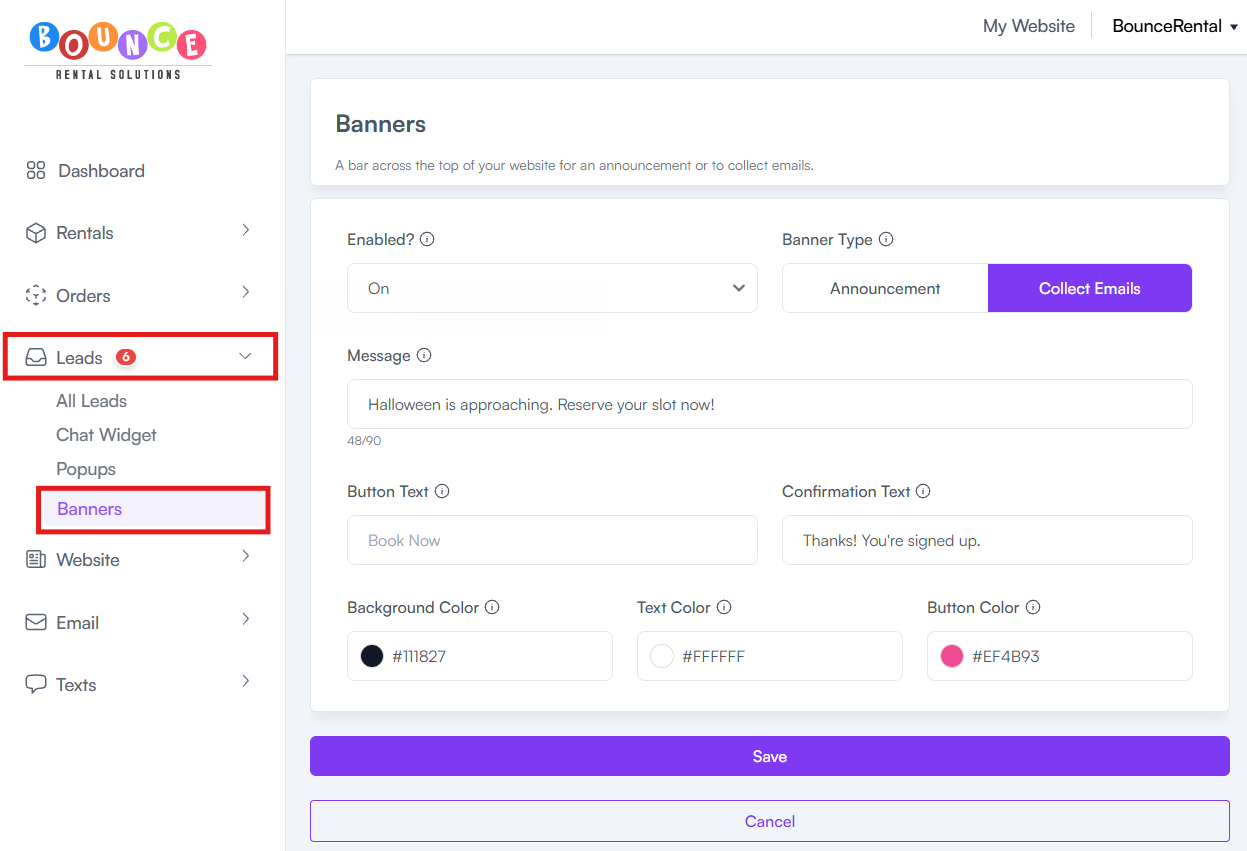
3. Open the banner settings to create or update your banner.
How to Configure Your Banner
1. Enable or Disable the Banner
Setting to control whether the banner appears on your website.
- On: The banner appears at the top of every page on your website.
- Off: The banner does not appear anywhere on your website.
Important: Visitors cannot close or dismiss the banner themselves.
2. Choose the Banner Type
Select the type of banner that matches your goal.
-
Announcement: Displays a message across the top of your website, with an optional button. Use it to promote discounts, seasonal offers, or important announcements.
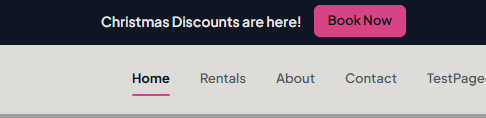
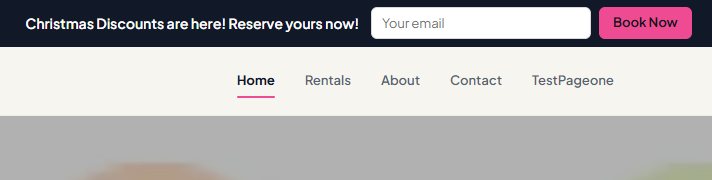
- Collect Emails: Allows visitors to sign up with their email address directly from the banner. Submitted email addresses are saved under Leads → All Leads, with the source labeled Banner.
3. Enter Your Message
Use the Message field to enter the text you want visitors to see.
- Keep the message short and easy to understand.
- The maximum length is 90 characters.
- Aim for a message that fits on one line, especially on mobile devices.
Example:
🎃 Halloween: Save 5% on Your Rental!
4. Set the Button Text
Use Button Text to choose the wording displayed on the banner’s button.
Keep it short, ideally one to three words.
Examples:
- Book Now
- Get Deals
- Save 5%
- Shop Now
For Collect Emails banners, tapping the button on a phone opens the email sign-up field.
5. Set the Confirmation Text
The Confirmation Text appears in the banner after a visitor successfully signs up with their email address.
Use a short message that confirms the sign-up.
Example:
Thanks! You're signed up.
This setting is particularly relevant to banners using the Collect Emails option.
6. Customize the Banner Colors
You can adjust the banner’s background, text, and button colors to match your website branding.
| Setting | What It Controls | Default Behavior |
|---|---|---|
| Background Color | The banner’s background | Uses your website template’s main color |
| Text Color | The color of the banner text | Uses a text color chosen for readability against the background |
| Button Color | The button’s background color | Uses your website template’s accent color |
Enter your preferred color using a hex color code.
Example colors:
- Background Color: #000E47
- Text Color: #FFFFFF
- Button Color: #F90810
Tip: Choose contrasting colors so visitors can easily read your message and see the button.
Best Practices for Website Banners
- Keep messages short. Stay within the 90-character limit and make your offer clear.
- Use a clear call to action. Button text like “Book Now” or “Get Deals” tells visitors what to do next.
- Match your website branding. Choose colors that complement your existing website design.
- Use announcements for promotions. Highlight seasonal offers, discounts, or important updates.
- Use Collect Emails to build your lead list. Encourage visitors to sign up and find submitted addresses under Leads → All Leads.
- Check the mobile experience. Make sure your message fits comfortably on smaller screens.
Important Notes
- When enabled, the banner appears at the top of every page on your website.
- When disabled, the banner is hidden from all pages.
- Visitors cannot close the banner themselves.
- Email addresses collected through a Collect Emails banner appear under Leads → All Leads, with the source Banner.